Wednesday, August 14, 2013

Cover Story: Hexie Handbag

Updated info @ bottom of post for those having issues understanding the printable pattern on Sew News...

This has been my busiest summer on record...Girls camp, family camp, working, trips and kids. I think back to school will be a rest...well except all the forcing kids out of bed, getting dressed and off to school then home, force them to do your homework, do thier chores and get to bed on time...but that time in between I might actually be able to catch up. Back in the saddle...back to the gym...back to me.  But before my last summer trip to Tahoe I received a package...a box from Sew News a returned project and the issue it would be in...and what a fun surprise...
=

I might have been as giddy as a little girl when I got my August/September issue of Sew News Magazine.  I squealed with delight when I saw my project donning the cover. My husband thought it was one of the kids...and I am okay with that. I am so thrilled to share this project and honored that it was cover worthy.

Sew News is also featuring the project online so click it..make it and share it!
Make a Hexie Handbag and let me know how it turned out...post me a link, send my a pic... I will share your version.... I would love to see your take on this tote.
Have fun and make it you!


I received an email with questions on the making of this tote...first THANK YOU! glad you like the tote enough to want to make it! From what I understand the pattern can be a little challenging to piece together...so to help simplify the situation here are the piece measurements...


Cut each of suiting, lining and craft weight interfacing:
Front and Back: 2 – 14 inches x 12.5 inches
Side panel: 2 – 14 inches x 6 inches
Bottom: 1 – 12.5 inches x 6 inches
Side Pocket: 2 – 7 inches x 6 inches
Front pockets: 2 – 10.5 inches x 12.5 inches (point at center and drop to 7 inches at sides)
Handles: 2 – 24 inches x 4 inches
Cut each of velvet and light weight interfacing:
Hexagon: 8 – 2.5 inches tall

Let me know who it turns out!

Tuesday, June 18, 2013

Leaves are a Fallin'

This apron was a project in the planning...picking the right dies and dyes makes all the difference. I can't emphasize enough how having the right tools and supplies makes all the difference in your finished project.

For full instructions and supply lists pick up a copy of Crafts n' things Fall 2013 issue.
This is what you are looking for...


 Let me just say Accuquilt knows what they are talking about when it comes to cutting fabric. These leaves with their intricate detail where crisply cut with no lingering string. What a delightful way to cut 100's of muslin leaves.
Once cut, dyeing was made simple with  Tulip One Step Dye the brush blending ombre technique gives you all the control and makes you look like a crafting hero. You will want to try this!


Special thanks to Annie for asking me to design and create this apron for Crafts n' things, I love a challenge. Pattiewack from ilovetocreate.com for her support and amazing Tulip One Step Dyes. And to Lynn @ accuquilt for having the perfect die for the job. 

Tuesday, June 4, 2013

forever corsage: a peek behind the process


Go visit Craft n' things for a full tutorial.


If you have ever wondered, and maybe you don't even care, what these ideas start out as...
Well if you do care to find out you will continue on if you don't you will just follow the link above to make your own. Each projects starts as a sketch...inspirations for a project can come from anywhere...this one was inspired by this cotton lace I found in the clearance bin at Hancock. So before I even had a project in mind I had to have every bit of it, this might be why I have such a large stash of potential (fabrics, ribbons, lace...,man I should clear out so I have more room to craft and space for new acquisitions). Once inspirations strikes I flesh out my ideas on paper with a pencil, I played with the lace to find out what it wanted to be. I try to make notes of supplies, steps and techniques I want to use so when it comes time to start a project I compile everything I need and don't have to stop in the middle to run to the store.

In the creative process with the original lace.


Here is the original sketch (don't judge, I'm not an artist) with the finished project...did it end up as it should have? Personally I think it turned out better then the sketch but that is my 2 cents.

I would love to see what your working on...your version of the forever flower...share!!


Tuesday, April 2, 2013

Easter Challenge...Accepted

This year I had the opportunity to sew dresses for a friends girls...the cutest dang things you have ever seen...the girls..not the dresses although the dresser are adorable.

The challenge was issued in the form of a photo. Could you make these...


Pinned Image

Challenge Accepted!

We made a couple of tweeks to the design...bring the bow scale down and give a little more coverage on the sleeve.

I also opted to fully line the dress but that was a personal choice.
Here are my results...


I told you they were cute right!

I might to a couple things different if I were to do them again..but the inspiration dress (which I can no longer find the link to other then on a pintrist board, or I would add it to the pic (Um found it! and if this pattern had been available when I began the process of this dress I might have used it...but I always like to make things harder on myself)) The bow was soo big it looked like a big lump in front....although I could probably make the bows a scosh bigger without drowning the girls.

Thanks Kara for the challenge and Miranda of one little minute for the inspiration.

Happy Easter.

Friday, March 29, 2013

Hard Core Dyeing!

I love to test the limits or techniques...how far can I stretch it? What other mediums can I use. This one is double duty...Hubby wanted to change the color of his RC car hubs and I wanted to play with some dye.

So of course no basic out of the bottle color would work for hubby. We started with Tulip Liquid Dye, a dingy old pot (I ruined years ago with dye), water, stove and white hub blanks.
Hubby blended the colors till be achieved his desired shade...only using a little...aprox 1/3 bottle yellow, 1/6 bottle brown...a dash of red. Filled the pot with water enough to cover hubs mixed in dye and heated with hubs in water for 1 - 2 hours until desired saturation achieved.
From glaring white to Rusty Orange. 


Then of course I needed to do a little something for me... I had seen these clothespins on pintrest and loved them but seriously 6 clothes pins for 7.50 is ridiculous! I pulled out Tulip ® One-Step Fashion Dye ™  and a bag of small clothes pins I purchased at Walmart (in the office section), disposable bowls, skewer. Mix dye as directed on packaging, fill bowl to height that will cover clothes pins. Submurge clothes pins let soak. You could brush it on but I wanted deep and full covering...dropped the whole dang clothes pin in the dye metal included...have you ever tried to rewire a clothes pin when both wood sides fall out? Not fun! 
Once I had achieved desired color I pulled them out (with rubber gloves on) and clothes pinned them to skews put them in an empty jar...to let dry. (clothes pins are at the top of the skewer while empty end is in the jar. :) ) 
Spray with a seal if desired.
I use these cutties to at the top of a gift bag to hold a card on...so cute and festive. 
You can buy a huge bag or full size clothes pins at the dollar store or an itsy bitsy size at Micheal's for under 3 bucks.
What are you going to do with your clothes pins? 

I will send a bottle of dye to most creative response!  So comment below...what will you do with yours & what color! 


Tuesday, March 26, 2013

Up-cycle Dad's Shirt

You know those shirts that hang in the closet that may be a little warn in the cuffs and elbows but you just don't have the heart to get rid of? This is the perfect project to utilize the shirt and make a little space in the closet. Go grab your copy of Crafts n' things or subscribe online to go get the directions.
I tied my napkin in a knot and tucked the tail under the collar. Unless you have a closet full of identical shirts every place mat will be different and you can raid your cotton stash for coordinating napkin tie colors.
Enjoy a close up look and a cover view of the Spring issue of Crafts n' things.


Wednesday, March 20, 2013

cookin' party

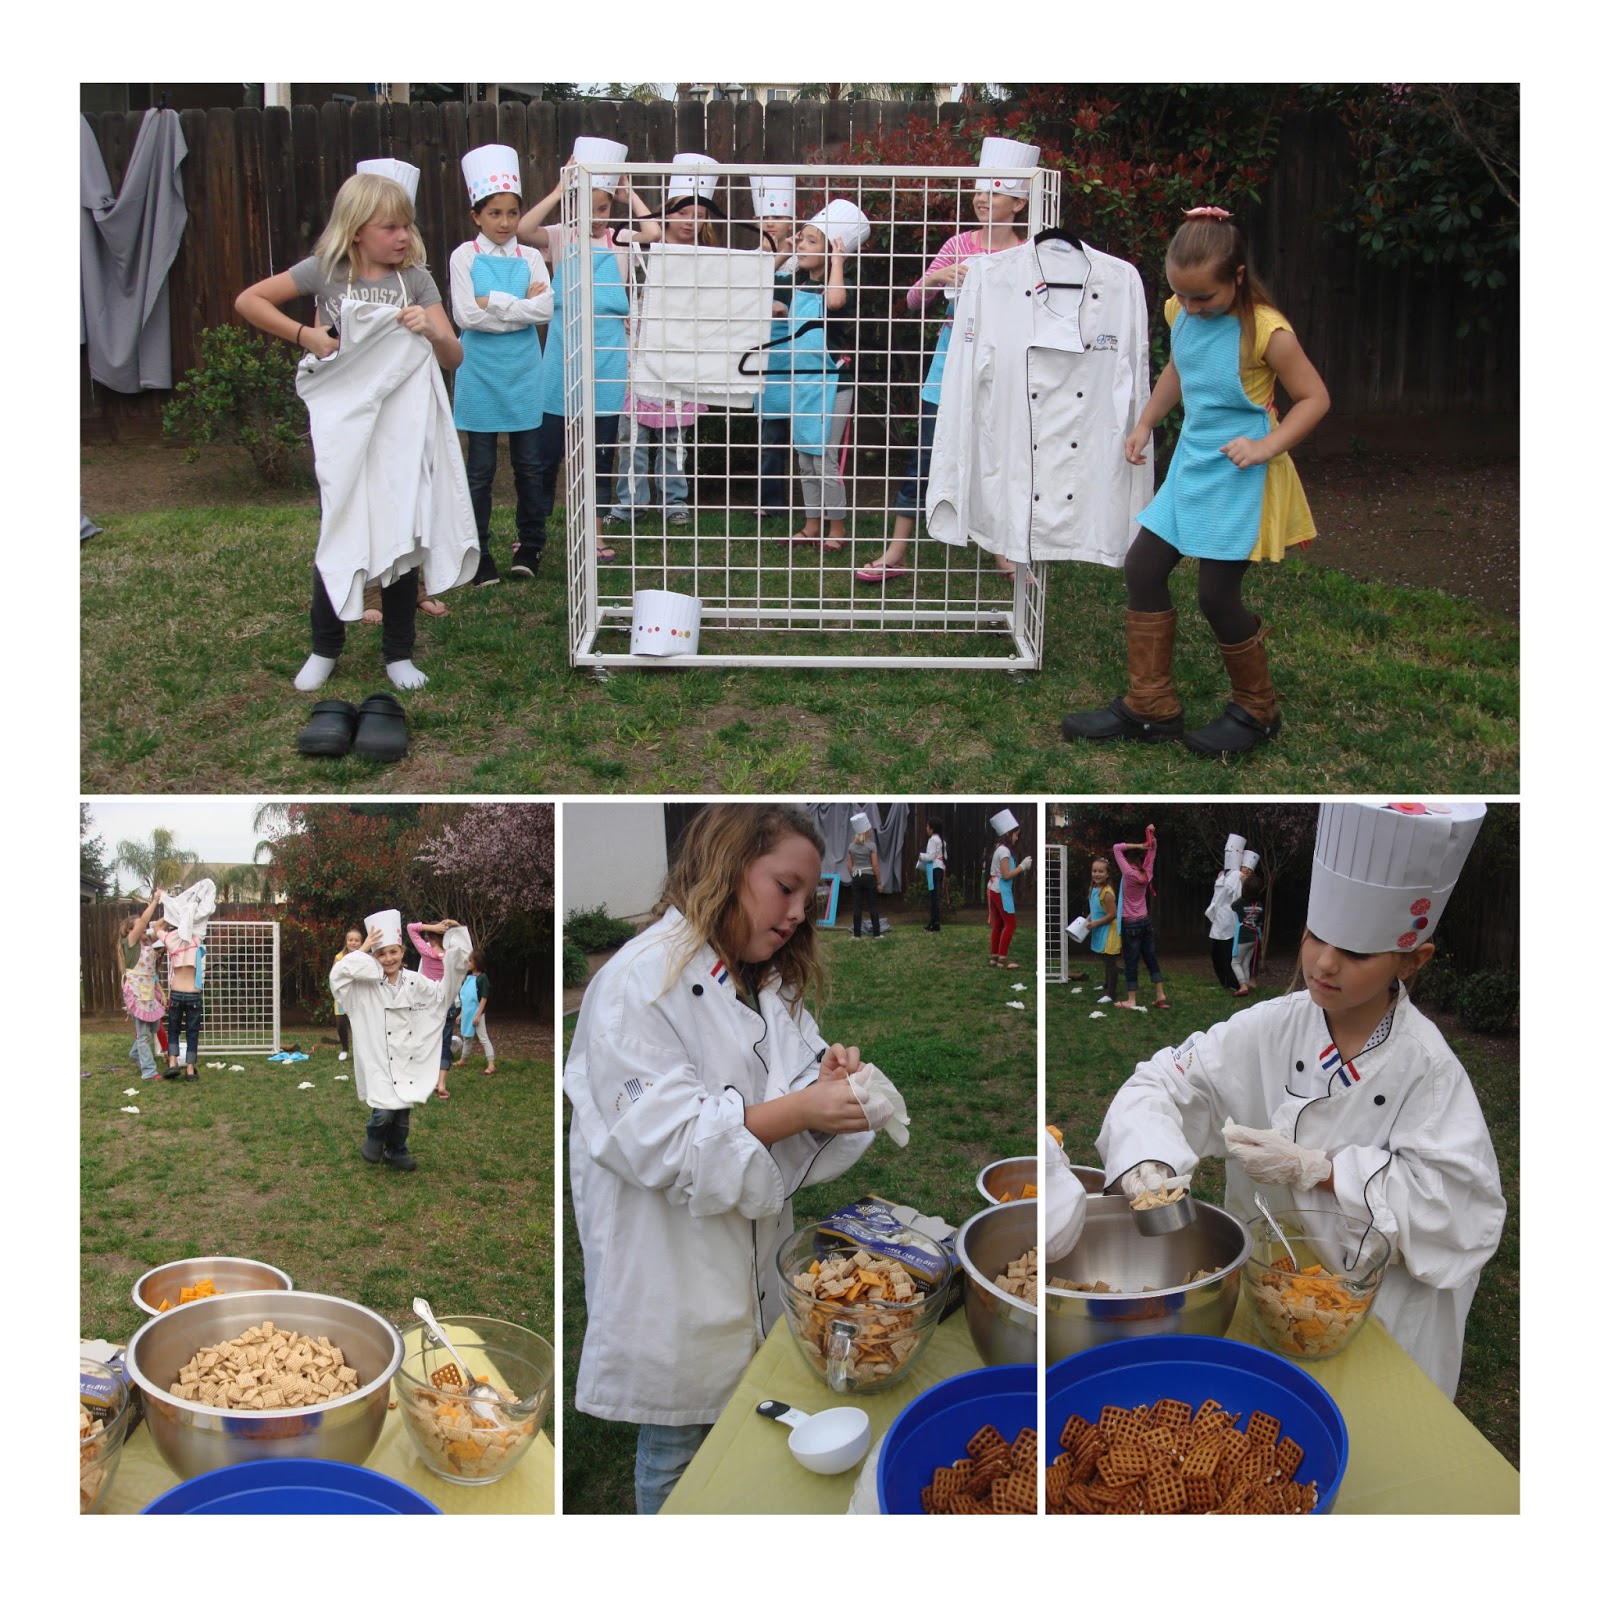
My youngest turned 9...she is kinda particular when it comes to....most things. She requested a "cooking party". So she invited her favorite chef (her dad just happens to be one) to help out.

We started off the event with introductions and crafting girls. Each girl customized there chef hat or toque, as the they are more formally known, using buttons and punched circles.

 Then off to the races...Chef Relay Race...
Each girl in turn had to don a chef jacket, clogs and chef hat. run to the prep table. put on rubber gloves. measure out 1 cup of each ingredient. stir the contents of the bowl and taste there work before running back and handing off the chef gear to the next girl.


 The little lady Chefs each made their own pizza and scarfed them down.


Then came cupcake Class. There was practice time with piping bags and a laminated practice sheets... Have you ever seen a 9 year old with a piping bag? So cute lots of giggles and quite a mess. Once practice was over they graduated to cupcakes and colored frosting.


And finally photo booth! A few kitchen items and cute frames and girls will giggle and pose for another 45 minutes or so. Each party goer got an apron (created from a dish towel  and ribbon tutorial to come), hat, a clean practice sheet and a plate of decorated cupcakes. This was a HUGE success say the nine 9 year olds that attended.